This document teaches how to use Xcalibur Global to set the client device default input language and user interface language to English.
The method taught is based on the following steps:
Select the OU containing the target device
Create an Xcalibur Policy that is linked to the selected OU
Configure the Xcalibur Policy to set the client device default input language and user interface language to English.
Applicable Product Version
Xcalibur Global Version 1.1 Rev. 2
Procedure
Select the OU containing the target device
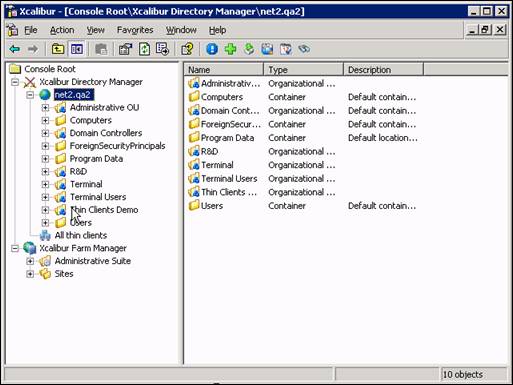
The OU in our example is Thin Clients Demo.
The Domain in our example is net2.qa2.
Launch the Xcalibur Global Management Console:
From the Task Bar select: Start \ Programs \ Xcalibur Global 1.1 \ Management Console.
Locate the OU Thin Clients Demo: Expand the path: Xcalibur Directory Manager \ net2.qa2.
Select the OU Thin Clients Demo.
Create an Xcalibur Policy that is linked to the selected OU
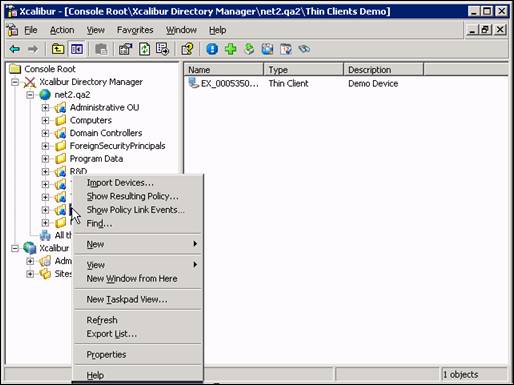
Right-click on the OU (Thin Clients Demo) to display the following drop-down menu:
Select Properties from the drop-down menu to display the OUproperties screen.
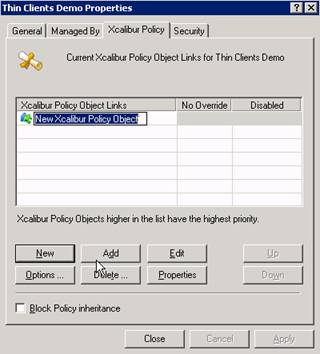
Select the Xcalibur Policy tab.
Click the New button and select TC Policy from the drop-down menu to create a New Xcalibur Policy Object that will appear in the Xcalibur Policy Object Links column.
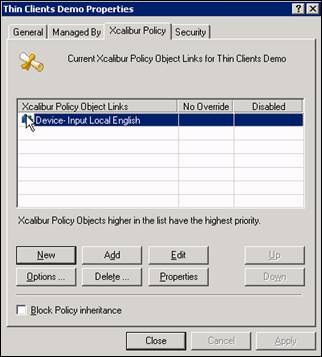
Enter a new name for the policy. In this example we will be using the name Device- Input Local English. Press Enter.
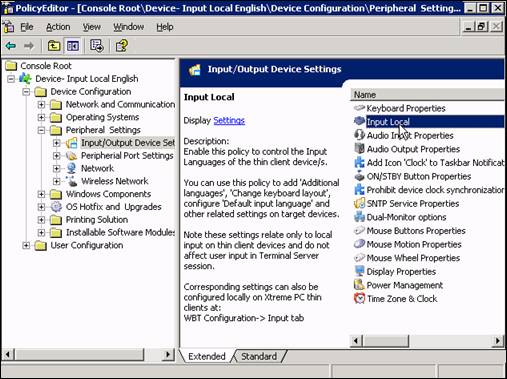
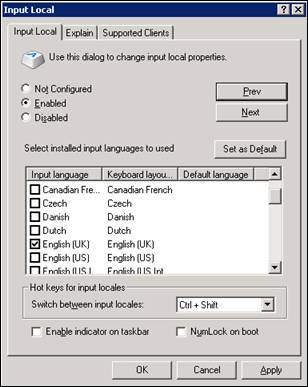
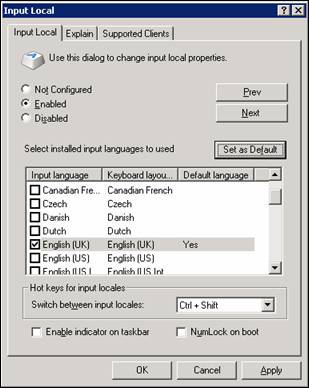
Configure the Xcalibur Policy to set the client device default input language and user interface language to English