This document teaches how to use Xcalibur Global to change client device screens via the Customized System Screens plug-in.
The Customized Systems Screens plug-in allows you to replace the following images that are used by the client device:
The flash screen image.
The screen saver image.
The logo image.
The wall paper image.
The method taught will be based on the following steps:
Configure the Plug-in software package.
Select the OU containing the target device.
Create an Xcalibur Policy that is linked to the selected OU.
Configure the Xcalibur Policy to change client device screens via the Customized System Screens plug-in.
Applicable Product Version
Xcalibur Global Version 1.1 Rev. 2
Procedure
Configure the Plug-in Software Package
Note: The plug-in software package configuration determines which image files will be available via the plug-in and will also determine, for each image file, what use it may be assigned.
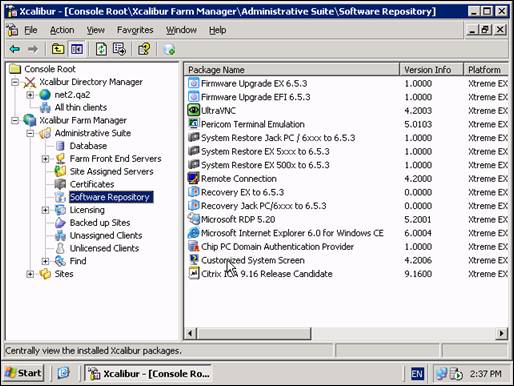
Launch the Xcalibur Global Management Console: From the Task Bar select: Start \ Programs \ Xcalibur Global 1.1 \ Management Console.
Locate the Software Repository: Expand the path: Xcalibur Farm Manager \ Administrative Suite. Select the Software Repository.
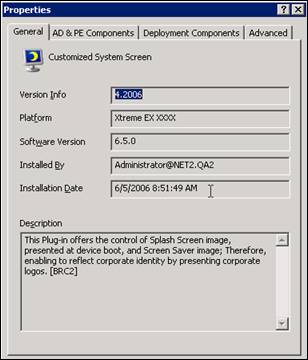
Double-click the Customized System Screen to open the Properties screen.
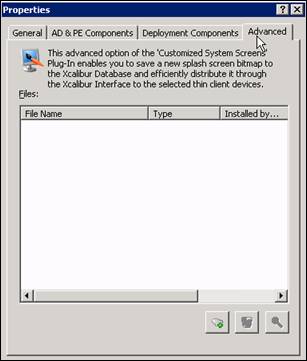
Select the Advanced tab to open the following screen:
Click the Add new file to the list button () to open the Import File screen.
In the Import File screen, click the Browse button () to browse for the desired image file.
The plug-in supports only Bitmap (*.bmp) image file.
Double-click on the desired image file to select it and to return to the Import File screen. After the image file is selected, all supported uses for the image will be enabled and selected by default.
To use an image as a Splash Screen the following requirements must be met: resolution 640x480, 256 colors, and size up to 302 Kb. The color of the bottom left pixel determines the color of the progress bar.
To use an image as a Logo the following requirements must be met: resolution 414x72, 256 colors, and size up to 200 Kb.
Deselect the undesired uses and leave the desired uses selected (in the example below, only the Use as Screen Saver Image has been left selected).
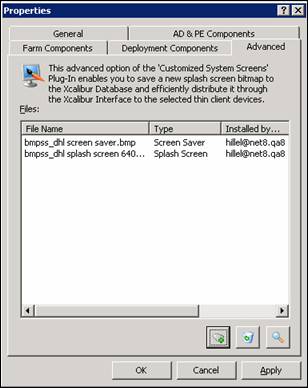
Click OK to return to the Properties screen. Additional image files can be added at this stage using the same procedure (in the example below 2 images have been added to the list, one is a Screen Saver image and the other is a Splash Screen image)
Click OK to return to the Xcalibur Management Console.
Select the OU containing the target device
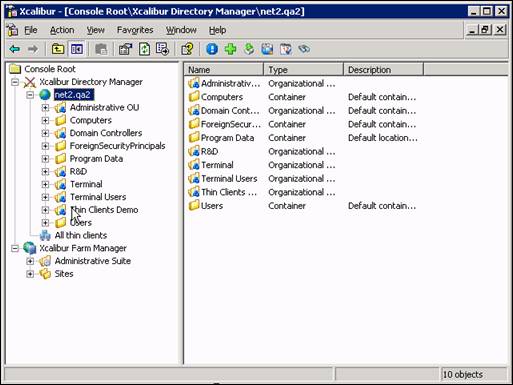
The OU in our example is Thin Clients Demo.
The Domain in our example is net2.qa2.
Locate the OU Thin Clients Demo in the Xcalibur Directory Manager branch Expand the path: Xcalibur Directory Manager \ net2.qa2.
Select the OU Thin Clients Demo.
Create an Xcalibur Policy that is linked to the selected OU
Right-click on the OU (Thin Clients Demo) to display the following drop-down menu:
Select Properties from the drop-down menu to display the OUproperties screen.
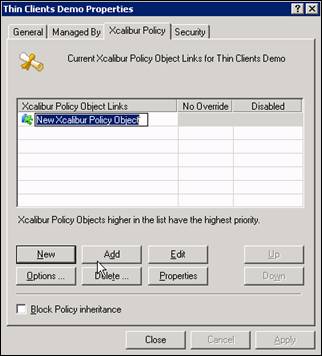
Select the Xcalibur Policy tab.
Click the New button and select TC Policy from the drop-down menu to create a New Xcalibur Policy Object that will appear in the Xcalibur Policy Object Links column.
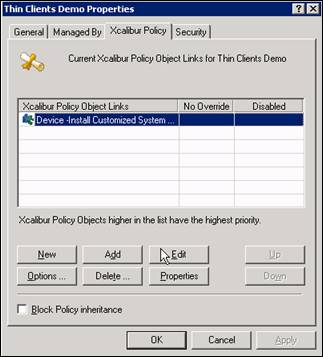
Enter a new name for the policy. In this example we will be using the name Device - Install Customized System Screens. Press Enter.
Configure the Xcalibur Policy to change client device screens via the Customized System Screens plug-in.
Select the Xcalibur Policy.
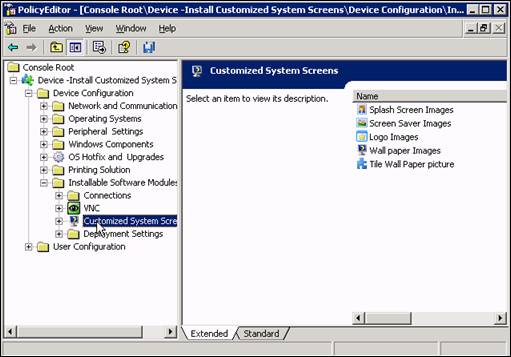
Click Edit to open the Policy Editor screen. Expand the followingPolicy Branch: <policy name> \ Device Configuration \ Installable Software Modules \ Customized System Screens
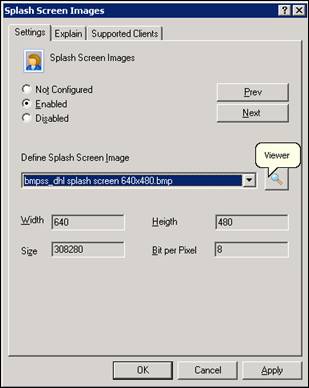
Double-click on Splash Screen Images to open the Splash Screen Images screen.
Select Enabled and then select the desired screen from the Define Splash Screen Image list.
Images available in this list are those defined during the software package configuration stage.
Click the Viewer button to view the selected image.
Close the viewer to return to the Splash Screen Images screen.
Click OK to return to the Policy Editor screen.
You now have returned to the following Policy Branch within the Policy Editor: <policy name> \ Device Configuration \ Installable Software Modules \ Customized System Screens
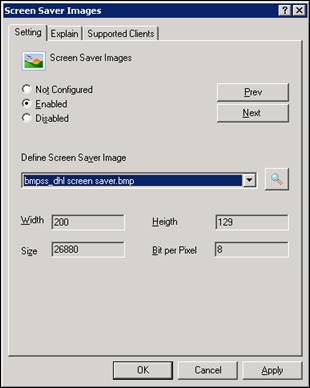
Double-click Screen Saver Images to open the Screen Saver Images screen.
Click Enabled and then select the desired screen from the Define Screen Saver Image list.
Click OK to return to the Policy Editor screen.
Close the Policy Editor screen to return to the Thin Clients Demo Properties screen.
Click OK to return to the Xcalibur Management Console.
Conclusion
Xcalibur Global now has a policy that changes client device screens via the Customized System Screens plug-in.
The policy is linked to the OU that was selected.
The policy will affect all devices within the OU and any child OUs (as long a there are no restrictions on policy inheritance).