How to Create an ICA Connection on the Client Device
Objectives
This document teaches how to create an ICA connection on the client device.
The ICA plug-in enables the client device to establish a connection with a server using the ICA protocol.
Applicable Product Version
Chip PC thin client device with firmware Version 6.5.3.
Citrix ICA Client version 9.0402
Procedure
- From the Desktop double-click on the My Connections icon to open the My Connections Manager screen.

- Select File \ New… to open the New Connection screen.

- Select the Citrix ICA Client connection type and click OK. The Select Server or Published Application screen opens after a few seconds.

- Enter the name of the Citrix server, or alternatively, click Refresh to retrieve a list of known Citrix servers and select the desired server.

- Click Next> to open the Select a Title for the ICA Connection screen.

- Change the title (if required) and click Next to open the Specify an Application screen.

- Click Next> to open the Specify Logon Information screen.

- Click Next> to open the Select Window Options screen.

- Select the desired number of Window Colors and click Next to open the Options screen.
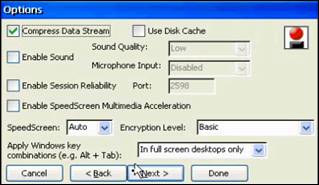
- Click Next to open the Firewall Settings screen.
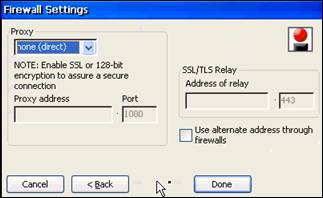
- Click Done to return to the My Connections Manager screen.

- The new connection now appears on the list in the My Connections screen.
- Close the My Connections Manager screen to return to the Desktop screen.
Conclusion
- The client device now has an ICA connection.
Movie: