This document teaches how to use Xcalibur Global to install the LPD Printer Plug-in on a client device.
The LPD Printer plug-in enables the client device to act as a print server. The client will be able to share printers that are connected to its local ports with other clients on the network. The remote clients will be able to send print jobs to the client with the LPD Printer plug-in by configuring an LPR printer.
The method taught is based on the following steps:
Select the OU containing the target device.
Create an Xcalibur Policy that is linked to the selected OU.
Configure the Xcalibur Policy to install and configure the LPD Printer Plug-in on a client device.
Applicable Product Version
Xcalibur Global Version 1.1 Rev.2
Prerequisites
Install the LPD Printer software package into the Software Repository. To learn how to install a software package into the Software Repository, refer to the document: How to Install a Software Package into the Xcalibur Global Software Repository, Ref: DG040H.
Install and configure the printer on the local device. Make a note regarding the port that the printer is connected to, specify the port type and number (LPT1, LPT2, COM1, etc.). This information will be needed when configuring the LPD Printer.
Procedure
Select the OU containing the target device
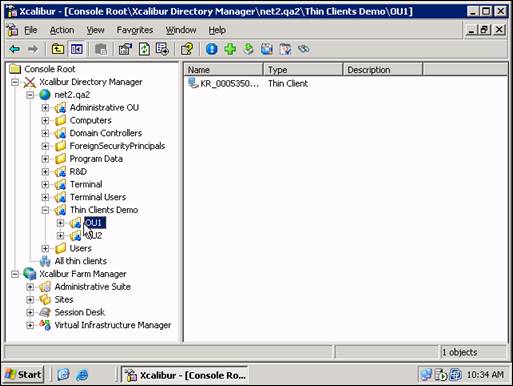
The OU in our example is OU1.
The Domain in our example is net2.qa2.
Launch the Xcalibur Global Management Console: From the Task Bar select: Start \ Programs \ Xcalibur Global 1.1 \ Management Console.
Locate the OU OU1: Expand the path: Xcalibur Directory Manager \ net2.qa2 \Thin Clients Demo.
Select the OU OU1.
Create an Xcalibur Policy that is linked to the selected OU
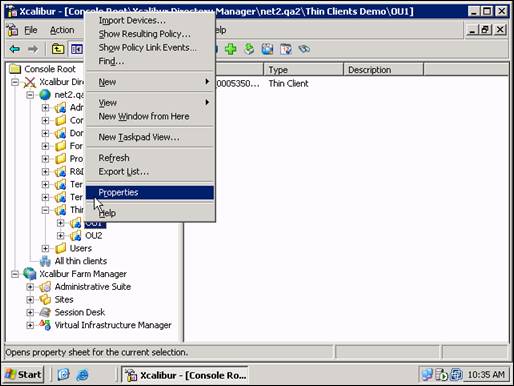
Right-click on the OU (OU1) to display the following drop-down menu:
Select Properties from the drop-down menu to display the OUproperties screen.
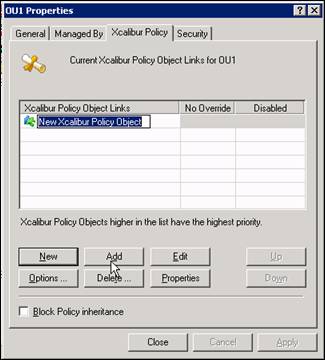
Select the Xcalibur Policy tab.
Click the New button and select TC Policy from the drop-down menu to create a New Xcalibur Policy Object that will appear in the Xcalibur Policy Object Links column.
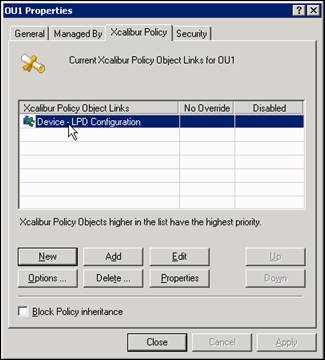
Enter a new name for the policy. In this example we will be using the name Device – LPD Configuration. Press Enter.
Configure the Xcalibur Policy to install the LPD Printer plug-in on a client device
Select the Xcalibur Policy.
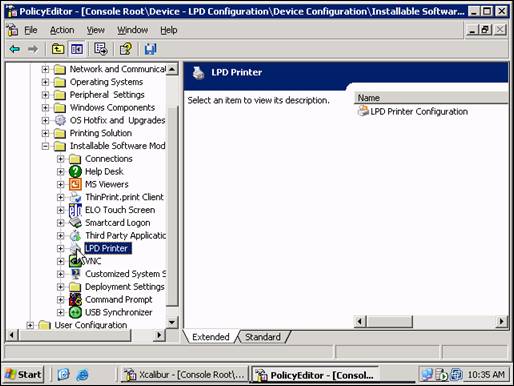
Click Edit to open the Policy Editor. Expand the followingpolicy branch: <policy name> \ Device Configuration \ Installable Software Modules
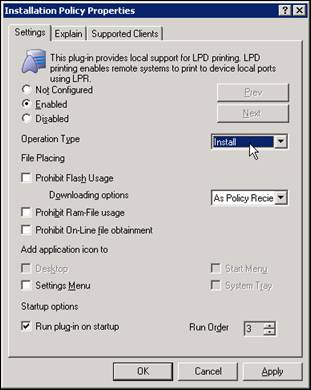
Right-click the LPD Printer and select Installation Policy… to open the Installation Properties screen.
If the plug-in does not appear under Installable Software Modules this is a result of the plug-in not being installed in the Software Repository.
Select Enabled.
Click OK to return to the Policy Editor screen.
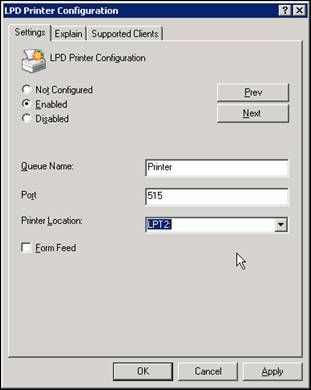
In the right pane, right-click on the LPD Printer Configuration and select Settings to open the LPD Printer Configuration window.
Select Enabled.
In the field Printer Location, select the port to which the shared printer is connected (LPT1, LPT2, COM1, etc.).
Click OK to return to the Policy Editor screen.
Close the Policy Editor screen to return to the OU properties screen.
Click Close to return to the Xcalibur Global Management Console screen.
Conclusion
Xcalibur Global now has a policy that installs and configures the LPD Printer plug-in on a client device.
The policy is linked to the OU that was selected.
The policy will affect all devices within the OU and any child OUs (as long a there are no restrictions on policy inheritance).