Locally install a new license in image 6.5.x using a network share
Objectives
This document explains how to locally install a new license in image 6.5.x using a network share.
Procedures
Please read How to Enable Access to Network Shares in image 6.5.x prior to using this document.
Note:
- The licenses (*.lic extension) should be obtained from Chip PC. All licenses should then be created using Chip PC Installer.
- To better understand how to extract the licenses to a Network Share using the Chip PC installer utility, please refer to: How to use the Chip PC Installer.
- This manual and the Chip PC Installer can be downloaded from the download section on this website.
After the licenses were extracted to the Network share:
- Go to the Start -> Settings -> Device -> Licenses tab
The Installed Licenses List is displayed. This list contains the following information:
- License Name – View the names of already installed licenses.
- Valid until – View the licenses expiration date (month and year).
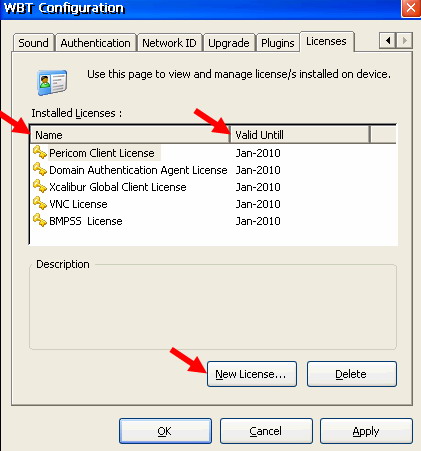
- To install a new license, press the New License button in the Licenses tab.
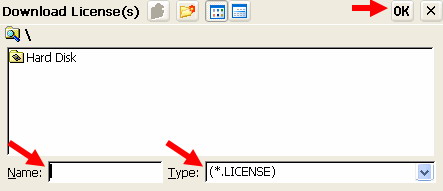
- In the Name text box enter your Network Share name and click OK.
Note: When working with network Shares you may be asked for credentials.
To see when these are needed, you first have to enable this feature.
Go to the Start -> Settings -> Device -> Network ID tab
Select the option "Prompt For Credential if needed (Domain only)".
The new settings will take affect without having to restart the device. - Select the license file by double clicking it.
Note: In order to view license files change the Type dropdown list to (*.License). - The operation must be repeted for each license file.