Access and use wireless support in image 6.5.x
Objectives
A wireless USB NIC is supported in image 6.5.3 and later. This document explains how to access this feature and how to use and configure it.
Procedures
Chip PC supports a wireless USB NIC in image 6.5.3 and later.
The supported device is XG-705A Wireless LAN USB dongle, IEEE 802.11 b/g
Note: The wireless driver may be compatible with other wireless devices, such as US Robotics USR805422.
However, there is no guarantee that it will work properly on any other devices not purchased from Chip PC.
Hardware requirements:
This feature is supported only by EX 54xx devices and up, and all Jack PC models.
How To:
- Go to Start -> Settings -> Device -> Wireless tab
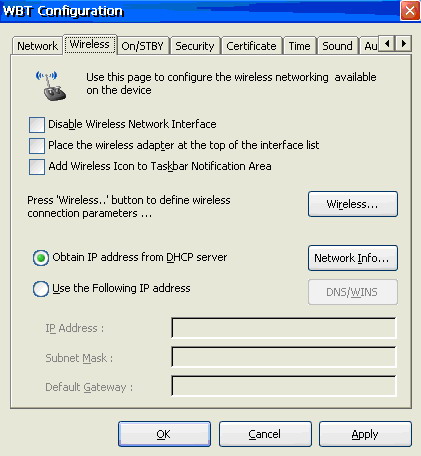
- Disable Wireless Network Interface – This option disables the wireless NIC.
- Place the wireless adapter at the top of the interface list – Both NICs are active by default (if they're both connected) and the embedded adapter has priority over the wireless adapter. This option lets you set the wireless adapter as the default network adapter.
- Add Wireless Icon to Taskbar Notification Area – Adds an icon to the taskbar area. The icon is an image of 2 computers side by side.
To view this icon, or any other icon, the System Tray area must be enabled.
To enable it go to Start -> Settings -> desktop, access the Taskbar tab and select the option "Show System Tray".

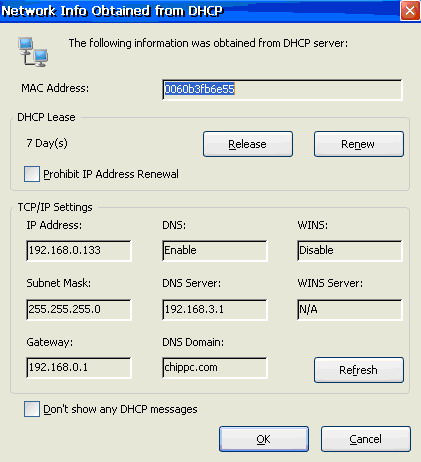
- Obtain IP address from DHCP server – IP address and other parameters can be obtained from a DHCP server.
Click the "Network Info…" button to view that information. Through this interface you can also perform several related basic actions, as shown below.
Release and Renew the IP address, Prohibit IP Address Renewal, Refresh the information displayed, and prevent DHCP messages from being displayed.
- Use the Following IP address – this section allows you to manually set your network parameters instead of using a DHCP server.
- The "Wireless" button – Click this button to define the wireless connection parameters.
The Wireless dialog has two tabs: Wireless Information and IP Information.
IP Information:
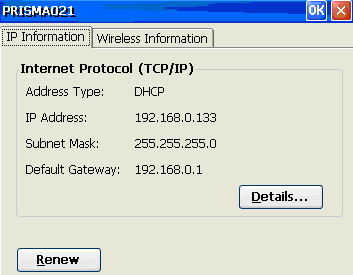
This section provides information regarding the TCP/IP protocol, as shown in the image above.
- The Renew button allows you to renew the IP address.
- The Details button provides more details on the network connection.
Wireless Information:
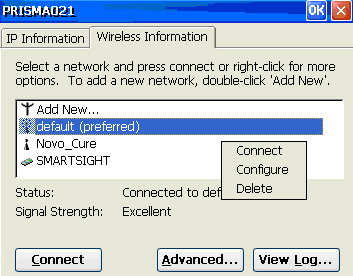
Select a network connection from the (automatically detected) list and click Connect.
You can right-click a connection for more options – Connect, Configure, Delete, as shown above.
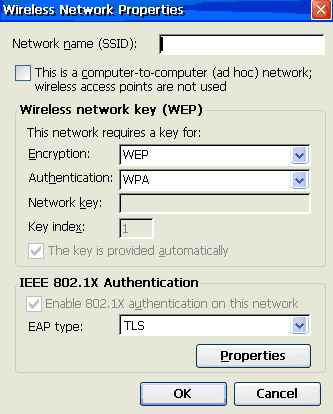
The Configure option opens the Wireless Network Properties dialog, which also opens when creating a new connection.
To create a new connection double-click "Add New…" – The add new wireless network dialog will open, as shown below.
Enter all the necessary information. This section is MS standard.
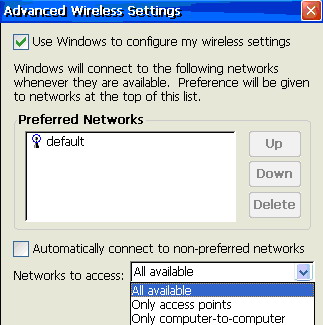
The Advanced button under the Wireless information tab opens the Advanced Wireless Settings dialog.
This area lets you set the priority of the connections, as shown below.
The View Log button opens the Wireless Networking Log, which provides more information.