Map a USB storage device into the RDP & ICA session in image 6.5.x
Objectives
This document explains how to map a USB storage device into an RDP or ICA session when working with image 6.5.x
Procedures
Ensure that OEM software version 6.5.1, or later, is installed on the device.
This can be confirmed by entering the WBT Configuration -> General tab -> OEM Software version.
- Go to the USB Device tab and Select the relevant options as shown in the image below.
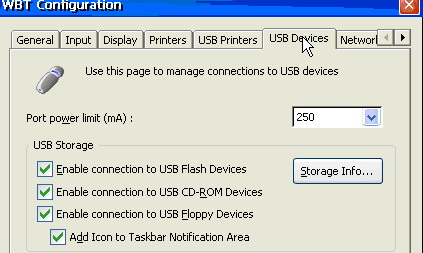
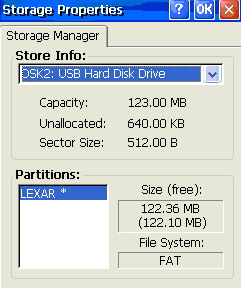
- Click on the "Storage info" button and confirm that your storage is being mapped locally.
Please note:
To view this icon, or any other icon, the System Tray area must be enabled.
- To enable it go to Start -> Settings -> desktop access the Taskbar tab and select the option "Show System Tray".
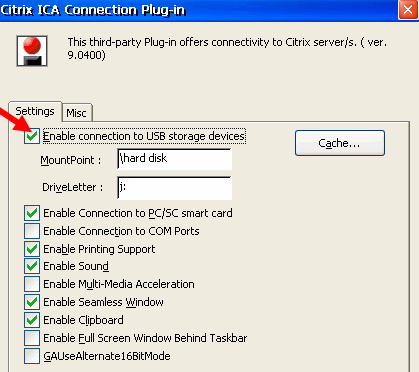
Please read How to enable local USB storage devices in image 6.5.x for further information. - When using an ICA connection, make sure that "Enable connection to USB storage devices" is selected.
- This can be done by accessing the WBT Configuration -> Plugins tab -> select the ICA plug-in and click the "Configure" button.
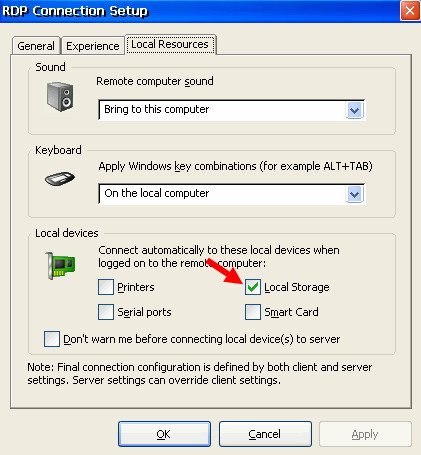
- When using RDP make sure that "Local Storage" is selected in the RDP Connection Setup.
- This should be done when creating a new RDP connection or by entering the properties of an existing connection through the My Connections dialog.
- Restart the device when finished.
- The next time you open a session using ICA or RDP these new setting will take effect.
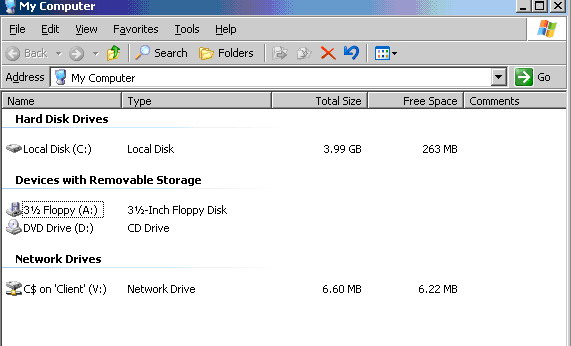
- The mapped storage device can now be accessed by entering "my computer" inside the session as demonstrated in the image below (network drive V).
Adding an icon to the Taskbar Notification Area is highly recommended.