Deploy a software plug-in to a device using Xcalibur Global policy
Objectives
Xcalibur Global has several built-in mechanisms enabling administrators to deploy plug-ins to devices.
This document will discuss deploying the plug-in using an Xcalibur Global policy.
Other mechanisms can be viewed in the "Software Deployment" section of the Xcalibur Global user manual.
Procedures
The first step of any type of software deployment process is to load the software package to Xcalibur Software Repository.
(Please read "Adding a package into the software repository" in the Xcalibur Global user manual).
The second step is to create the policy deploying the plug-in to the device:
· Select the object you wish to deploy the software to (Domain, OU, User, Device).
Note: Xcalibur policies are passed by inheritance from a parent object to a child object.
Hence, a policy assigned to an OU will be passed down to all devices in that OU and all of its child OUs
- Right click on the selected object and select Properties.
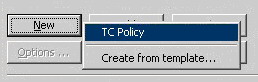
- Go to the Xcalibur Policies tab and click on New \ TC Policy
- Name the newly created policy and click Edit to open the Policy Editor dialog
Note: It is recommended to give a logical name to the policy for future use.
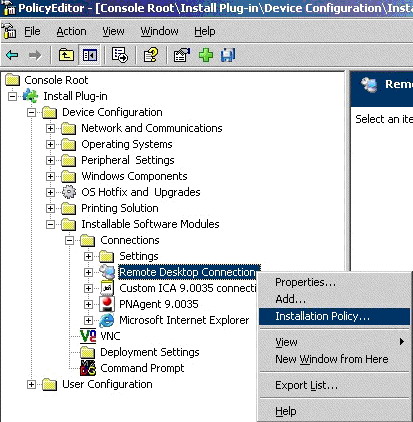
For example, a device level policy that installs RDP can be called: Device – RDP installation policy. - In the Policy Editor go to: Device Configuration -> Installable Software Modules
Select the plug-in you wish to install by right clicking it and selecting Installation Policy from the menu.
If you wish to deploy a connection plug-in enter Connections first, as shown below.
- In the Installation Policy Properties dialog, Check the Enabled check box (as shown in the image below).
- Use the Operation Type combo box to select which operation to perform (Install / Uninstall)
- Select the As Policy Received check box to apply the policy during the device's next Alive Event. This option takes into consideration the setting entered in the Plugins Service (e.g. when to deploy).
(Right click the Xcalibur Farm Manager, select properties from the menu, go to the Plugins Service tab)
The On-Demand option is not fully active at the moment, and should NOT be used. - Click OK and close the Policy editor dialog.
- Use the "Add application icon to" and "File Placing" sections at your descretion.
For a more detailed explanation of the "Installation Policy Properties" look below.
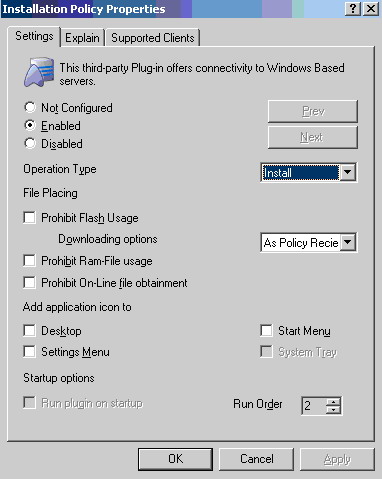
- File Placing: As default, plug-ins are installed into the device flash (Disk on chip). File placing settings allow specifying alternate locations.
- Prohibit Flash Usage: Prevents plug-in files from being installed on the flash. Once selected, plug-ins will be installed into a RAM-File. A RAM-File specifies that the RAM Memory can be used for Plug-in files storage. Plug-ins installed into RAM-File are retrieved once (during installation) from the network and then run from the RAM-File until the next device boot. Use the RAM-File option when you run out of flash storage space.
- Prohibit RAM-File usage: Prevents plug-in files from being installed into the RAM.
- Downloading Options: As default plug-in installation is triggered during Xcalibur Policy application. The Downloading Options allows further customizing the installation options.
- As Policy Received: this is the default setting. Once the Xcalibur Policy is applied, the thin client triggers an installation request and waits for the Plug-ins Installation Service Working Hours.
- On-Demand: Installs plug-ins in a dynamic way. By select the On-Demand option from the Download Options combo box the plug-in will only be sent once the user will attempt to create the connection.
- Add Application Icons To: Specify whether to place an icon on the Desktop / Start Menu / Settings Menu / System Tray.
- Start-up Options: Specify whether the Plug-in will be activated during the boot process.