This document explains how to enable and use local USB storage devices, such as Disk on Key, CD ROM and Floppy.
Procedures
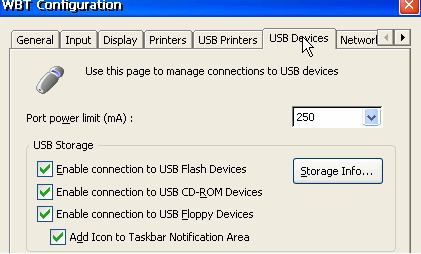
Access the WBT Configuration: Start -> Settings -> Device Go to the USB Device tab and Select the relevant options as shown in the image below.
The option "Port power limit (mA)" lets the user define the USB port power limit. This ability may be needed when connecting local USB devices with high power consumption. In some cases, the power limit must be increased (up to 1000 mA) for a device to work.
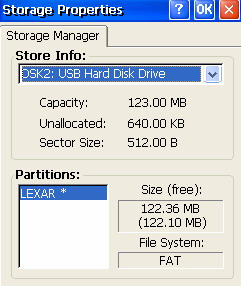
Click on the "Storage info" button and confirm that your storage is being mapped locally.
Adding an icon to the Taskbar Notification Area is highly recommended. It provides an indication that the device is being recognized.
Double clicking the icon provides quick access to the "Storage Properties" dialog.
To view this icon, or any other icon, the System Tray area must be enabled.
To enable it go to Start -> Settings -> desktop access the Taskbar tab and select the option "Show System Tray".
To map a USB storage device into a session, please read: How to map a USB storage device into the RDP/ICA session in image 6.5.x