How to Install a License File into the Xcalibur Global Database
Objectives
This document teaches how to install a license file into the Xcalibur Global database.
Applicable Product Version
Xcalibur Global Version 1.1 Rev. 2
Procedure
- Launch the Xcalibur Global Management Console:
From the Task Bar select:
Start \ Programs \ Xcalibur Global 1.1 \ Management Console - Expand the path:
Xcalibur Farm Manager \ Administrative Suite
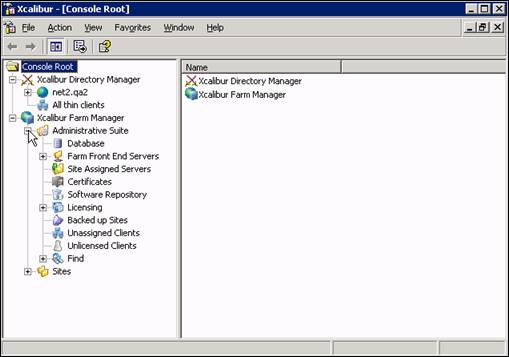
- Select Licensing.
- Right-click Licensing to open the drop-down menu.
- Select Install License…
- The License Installation Wizard screen will open
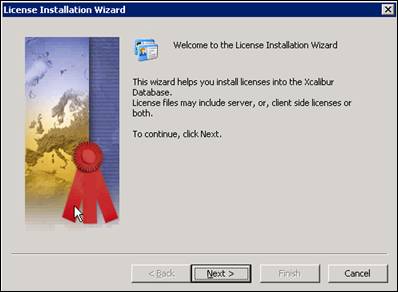
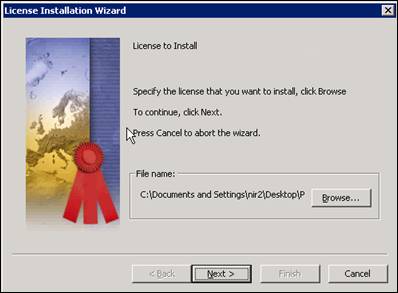
- Click Next> to open the following License Installation Wizard screen.
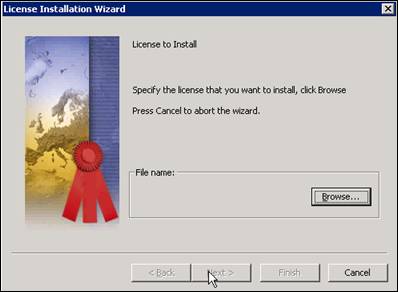
- Click Browse… to locate the license file.
- The following screen will open
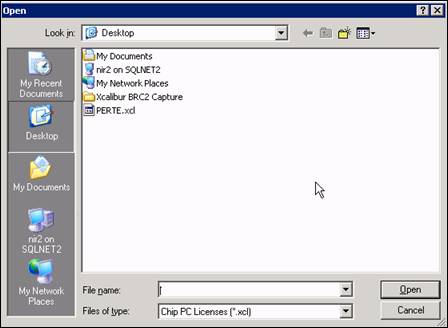
- Select the <license_name.xcl> (in this case PERTE.xcl) and click Open to return to the License Installation Wizard screen.
- Click Next> to continue.
- The following License Installation Wizard screen will open.
- The name of the license appears in the second row of text in this screen.
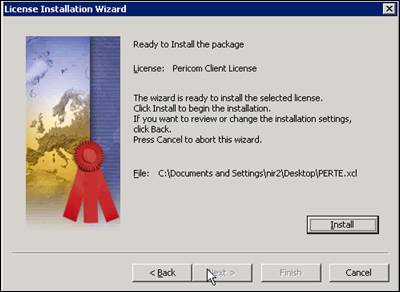
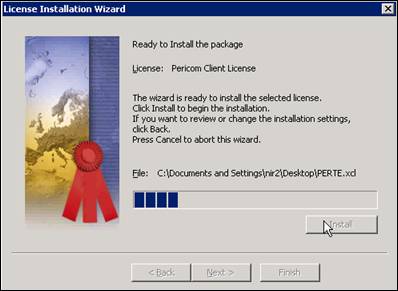
- Click Install to begin the license installation process. The progress bar displays the installation progress.
- The following License Installation Wizard screen opens when the installation process is over.
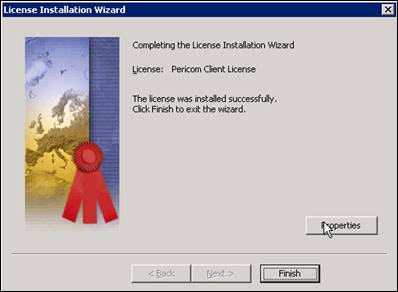
- Click Finish to open an event log window at the top left corner of the screen.
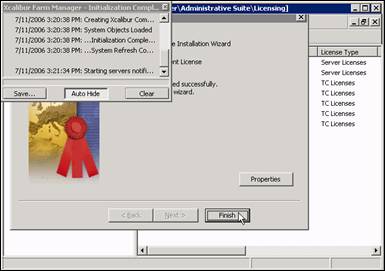
- The window disappears after a few seconds and the Xcalibur Global Management Console screen appears.
Conclusion
- The license file is now installed in Xcalibur Global database.
Movie: