How-To Locally install Plug-ins in image 6.5.x
Objectives
This document provides a step-by-step description of local Plug-ins installation in image 6.5.x.
The method taught for plug-in installation is based on one of the following steps:
- Installation Via FTP Server
- Installation Via USB storage
- Installation Via Network Share folder
Note:
This article assumes prior knowledge of how to use the Chip PC Installer.
Applicable Product
- Device Firmware version 6.5.x
Installation via FTP
Before You Begin
- Download the required plug-in from Chip PC web site, use the Chip PC installer to extract the plug-in files to an FTP / Shared Folder you wish to work with.
Procedures
- Go to Start -> Settings -> Device -> Plugins tab
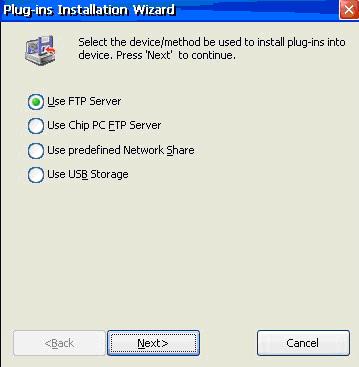
- Click on New to access the Plug-ins Installation Wizard
- Select Use FTP Server and click Next
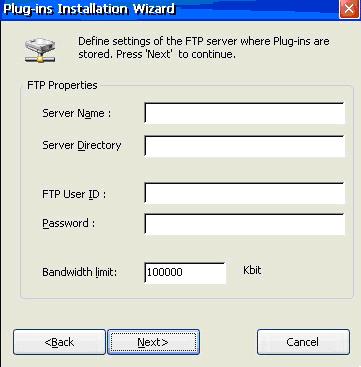
- Enter the FTP server details and user credentials and click next.
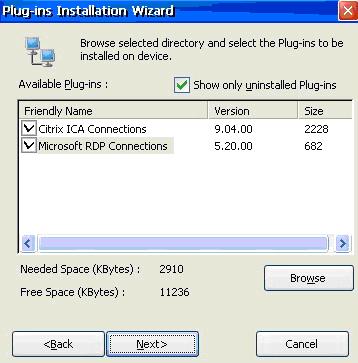
- Click on the Browse button to view the list of available plug-ins.

- The option Show only uninstalled plug-ins is checked by default Uncheck it to view plug-ins that are already installed Select the plug-ins you wish to install (as demonstrated above)
- Click Next to Install. An information window will appear follow the onscreen instructions and finish the process. The new plug-ins will appear in the Available Plug-ins view of the Plug-ins tab.
- Restart the device when asked to.
Note:
The Needed Space and Free Space parameters Make sure you have sufficient free space to install the plug-in.
Install via USB storage
Before You Begin
- Make sure the plug-in files are present on the USB storage device you wish to work with.
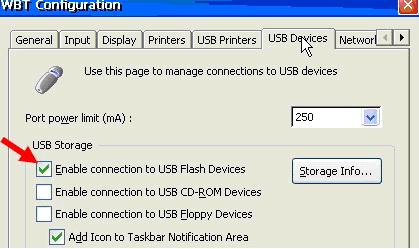
- Access the WBT Configuration: Start -> Settings -> Device -> USB Devices
- On the USB Devices tab, select "Enable Connection to USB Flash Devices".
- Adding an icon to the Taskbar Notification Area is highly recommended. To view this icon, or any other icon, the System Tray area must be enabled.
- To enable USB Icon: go to Start -> Settings -> desktop, Access the Taskbar tab and select the option "Show System Tray".
- Restart the device.
Note:
Enabled local USB storage on the device. For more information on how to enable local USB storage devices in image 6.5.x please refer to: www.chippc.com/support/knowledge-base
Procedures
- Connect the USB storage device to the Jack PC or Xtreme PC.
- Go to Start -> Settings -> Device -> Plugins tab
- Click on New to access the Plug-ins Installation Wizard
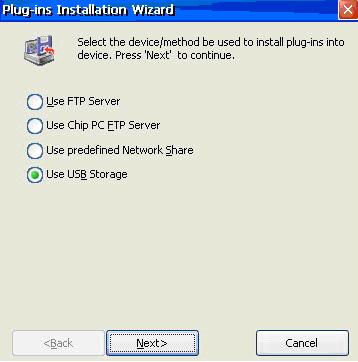
- Select Use USB Storage and click Next
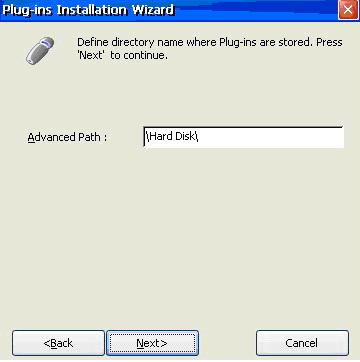
- The USB storage device is represented by default as \Hard Disk\,
Click Next
- Click on the Browse button to view the list of available plug-ins. (the browse option can read the entire default tree structure described earlier)
- The option Show only uninstalled plug-ins is checked by default Uncheck it to view plug-ins that are already installed
- Select the plug-ins you wish to install (as demonstrated below)
- Click Next when ready

Note:
The Needed Space and Free Space parameters Make sure you have sufficient free space to install the plug-ins. - Click on the Install button to begin the installation
- Click on the Finish button to complete the process.
- The new plug-ins will appear in the Available Plug-ins view of the Plug-ins tab.
- Confirm all open dialogs and restart the device when asked to.
Install Via Network Share
Before You Begin
- Make sure the plug-in files are present on the network share you wish to work with.
- Enable Access to Network Shares:
- To access the WBT Configuration go to: Start -> Settings -> Device -> Network ID
- On the Network ID tab, select "Enable Access to Network Shares".
- Type the default network share path (\\Computer name\Share name\).
- Select the option "Prompt for Credential if Needed (Domain only)”.
.jpg)
- Restart the device for the changes to take effect.
Procedures
- Go to Start -> Settings -> Device -> Plugins tab
- Click on New to access the Plug-ins Installation Wizard
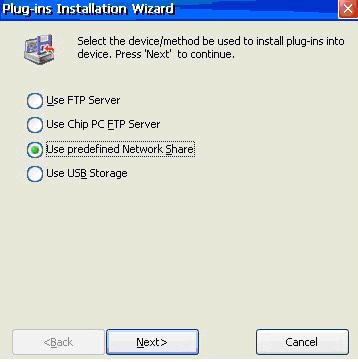
- Select Use predefined Network Share and click Next
- Click Next to continue

- Click Next
- Click on the Browse button to view the list of available plug-ins.
(the browse option can read the entire default tree structure described earlier). You may be asked to provide user credentials to access the network share. - The option Show only uninstalled plug-ins is checked by default Uncheck it to view plug-ins that are already installed
- Select the plug-ins you wish to install and click Next
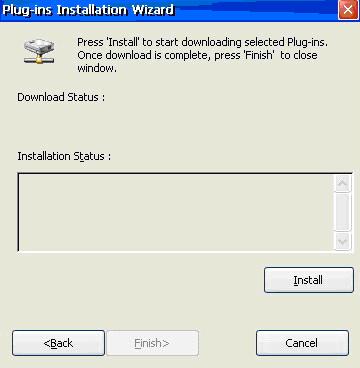
- Click on the Install button to begin the installation

- Click on the Finish button to complete the process.
- The new plug-ins will appear in the Available Plug-ins view of the Plug-ins tab.
- Confirm all open dialogs and restart the device when asked to.
Note:
Note the Needed Space and Free Space parameters Make sure you have sufficient free space to install the plug-ins.