Chip PC Thin Clients  
 
     
Support
Support Center
Knowledge Base
Software Downloads
Register Warranty
Request Support
Request RMA
Online Training
Resources
Home > Support > Knowledge Base
How to Use Xcalibur Global to Configure Network Settings on TCs

Last modified: Thursday, Jun 21, 2007 Article ID: 736
Related products: Xcalibur Global Management Software

Objectives

This document explains how to use Xcalibur Global to configure network settings on TCs.

This procedure is based on the following steps:

  1. TCs
  2. Create an Xcalibur Policy that is linked to the target OU
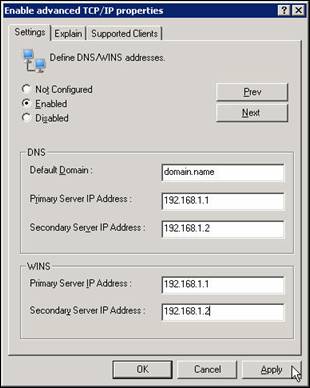
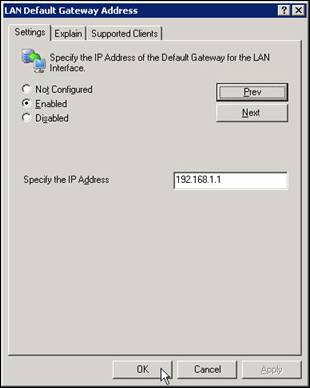
  3. Configure the Xcalibur Policy to configure network settings

Applicable Software Versions

This document is based on an environment with the following installed software versions:

Xcalibur Global 1.1 Rev. 2

2007 Resource Kit v.2 & SP4

Chip PC Thin Client Firmware 6.5.5

Select the OU that Contains the Target TCs

  1. On the Task Bar, click Start > Programs > Xcalibur Global 1.1 > Management Console to launch the Xcalibur Global Management Console.
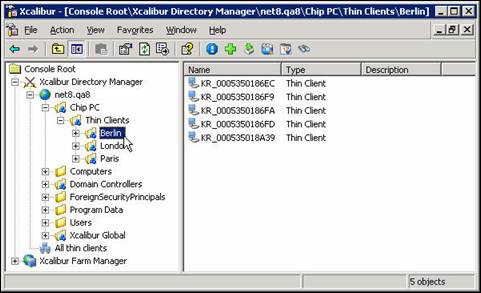
  2. In the Xcalibur Management Console window, expand the folders under Xcalibur Directory Manager to reveal the OU that contains the target TCs. In this example expand: net8.qa8 \ Chip PC \ Thin Clients.


    Figure 1: Xcalibur Management Console - Select Target OU
  3. Select the target OU (In this example Berlin).

Create an Xcalibur Policy that is Linked to the Target OU
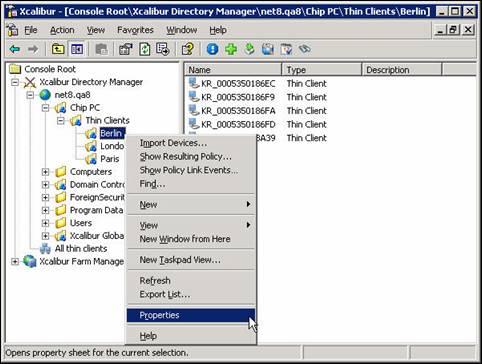
  1. Right-click on the target OU (Berlin in this example) to display a menu.
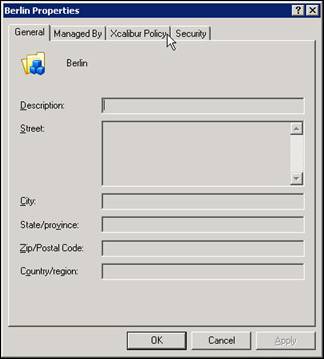
  2. On the menu, click Properties to display the <OU> Properties dialog box.


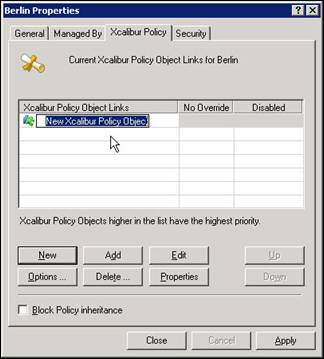
    Figure 2: Xcalibur Management Console – Target OU > Properties
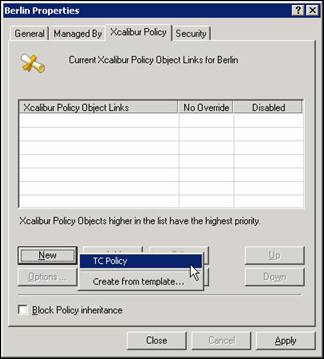
  3. In the <OU> Properties dialog box, select the Xcalibur Policy tab.


    Figure 3: <OU> Properties Dialog Box – Select Xcalibur Policy Tab
  4. In the Xcalibur Policy tab, click New to open a menu.


    Figure 4: Xcalibur Policy Tab – New > TC Policy
  5. On the menu, select TC Policy to create a New Xcalibur Policy Object that will appear in the Xcalibur Policy Object Links column.

     
    Figure 5: Xcalibur Policy Tab – New Xcalibur Policy Object
  6. Type a new policy name (“Device – TCP/IP settings” in this example) over the default name “New Xcalibur Policy Object”.

Configure the Xcalibur Policy to Configure Network Settings

  1. Select the newly created policy (“Device – TCP/IP Settings” in this example) and click Edit to open the Policy Editor window.


    Figure 6: Xcalibur Policy Tab – Edit New Policy
  2. In the Policy Editor window, expand the following path:
    <Policy Name> \ Device Configuration \ 2007 Resource Kit v.2 \ Network


    Figure 7: Policy Editor Window – Network Settings
  3. In the Network folder, select Network Param.
  4. In the right pane, double-click on Enable advanced TCP/IP properties to open the Enable advanced TCP/IP properties dialog box.
  5. In the Enable advanced TCP/IP properties dialog box, perform the following:
    1. Select Enabled
    2. In the DNS section, type in the appropriate information in the following text boxes:
      1. Default Domain:
      2. Primary Server IP Address:
      3. Secondary Server IP Address:
    3. In the WINS section, type in the appropriate IP addresses in the following text boxes:
      1. Primary Server IP Address:
      2. Secondary Server IP Address:


        Figure 8: Enable advanced TCP/IP properties Dialog Box
    4. Click OK to return to the Policy Editor window.
  6. In the Policy Editor window, in the right pane, double-click LAN Default Gateway Address to open the LAN Default Gateway Address dialog box.
  7. In the LAN Default Gateway Address dialog box, perform the following:
    1. Select Enabled
    2. In the Specify the IP Address text box, type in the default gateway address for the LAN.


      Figure 9: LAN Default Gateway Address Dialog Box
    3. Click OK to return to the Policy Editor window.
  8. Close the Policy Editor window to return to the <OU> Properties dialog box.
  9. In the <OU> Properties dialog box, click Close to complete this procedure.

Procedure Outcome

  • Xcalibur Global now has a policy that configures network settings.
  • The policy is linked to the OU that was selected.
  • The policy will affect all devices within the OU and any child OUs (as long a there are no restrictions on policy inheritance).

Movie

 
Copyright Chip PC. All rights reserved.