How to Configure Default Device Authentication
1. Objectives
This document explains how to configure Default Device Authentication.
This procedure is based on the following steps:
Thin Clients. Configure Default Device Authentication. 2. Applicable Software Versions
This document is applicable to an environment with the following software versions:
Xcalibur Global 1.1 Rev.2 Chip PC Thin Client Firmware 6.5.3 3. Procedure
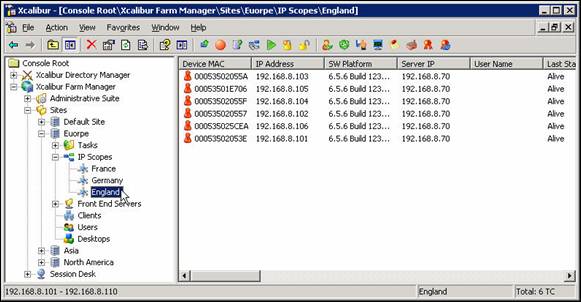
Select the Farm, Site, or Scope containing the target Thin Clients
Launch the Xcalibur Global Management Console by clicking on Start > Programs > Xcalibur Global 1.1 > Management Console .
In the Management Console, expand the path to configure an IP Scope, in this example: Xcalibur Farm Manager \ Sites \ Europe \ England Configure Default Device Authentication
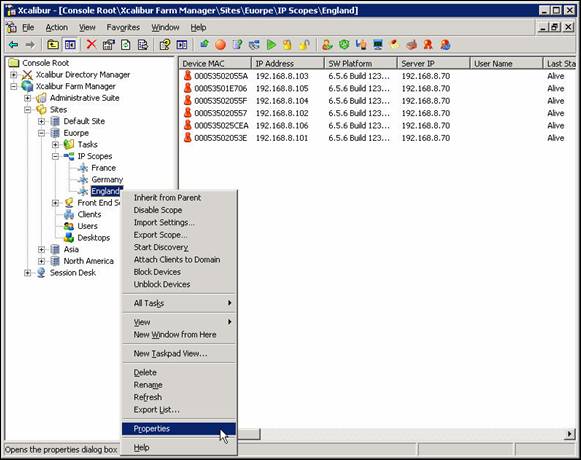
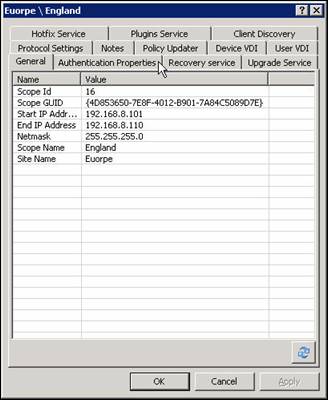
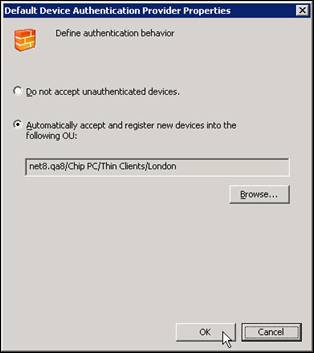
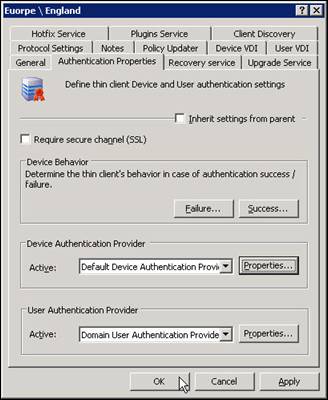
In the expanded folders, select and right-click the target Scope (In this example England ) to view menu. In the menu, select Properties . In the <Site \ Scope > dialog box, select the Authentication Properties tab.Site \ Scope > Properties Box- General Tab In the Authentication Properties tab: Clear the Inherit settings from parent check box. In the Device Authentication Provider area, in the Active drop-down box, select Default Device Authentication Provider . Click Properties… .Site \ Scope > Dialog Box- Authentication Properties Tab In the Default Device Authentication Provider Properties dialog box select one of the following options:Do not accept unauthenticated devices. Automatically accept and register new devices into the following OU: The device will be automatically authenticated, it will then be registered in the Xcalibur Global database and assigned to the specified OU (click Browse… to select the desired OU). Click OK . In the <Site \ Scope > dialog box, click OK to complete the procedure and return to the Xcalibur Global Management Console.Site \ Scope > Dialog Box- Authentication Properties Tab 4. Process Outcome:
Default Device Authentication has been defined for the selected Farm, Site, or Scope. The authentication settings of the Farm will be inherited by all Sites (as long as the inherit option, in the Site, was not disabled). The authentication settings of a Site will be inherited by all the Scopes it contains (as long as the inherit option, in the Scope, was not disabled). The authentication settings of a Scope will determine the authentication behavior of all the thin clients it contains. 5. Movie