How to Configure Default User Authentication
1. Objectives
This document explains how to configure Default User Authentication.
This procedure is based on the following steps:
- Thin Clients.
- Configure Default User Authentication.
2. Applicable Software Versions
This document is applicable to an environment with the following software versions:
- Xcalibur Global 1.1 Rev.2
- Chip PC Thin Client Firmware 6.5.3
3. Procedure
Select the Farm, Site, or Scope containing the target Thin Clients
- Launch the Xcalibur Global Management Console by clicking on Start > Programs > Xcalibur Global 1.1 > Management Console.
Note:
User Authentication can be configured on the Farm, Site, or Scope levels. The Scope level is shown here as an example.
- In the Xcalibur Management Console, expand the path to configure an IP Scope, in this example:
Xcalibur Farm Manager \ Sites \ Europe \ England
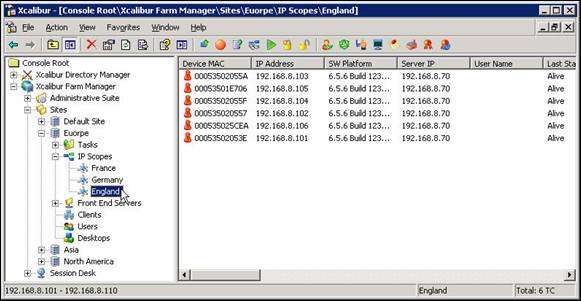
Figure 1: Xcalibur Farm Console - Select Target Scope
Configure Default User Authentication
- In the expanded folders, select and right-click the target Scope (in this example: England) to view a menu.
- In the menu, select Properties.
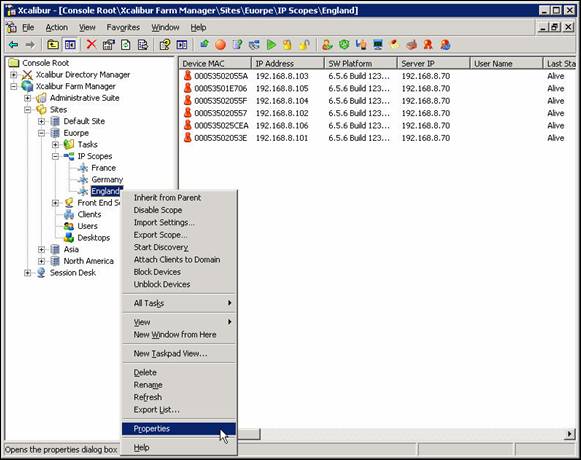
Figure 2: Xcalibur Management Console – Target Scope > Properties
- In the <Site \ Scope> dialog box, select the Authentication Properties tab.
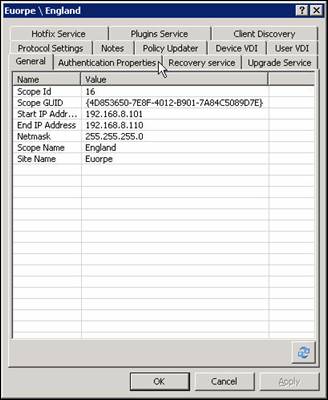
Figure 3: <Site \ Scope> Properties Box- General Tab
- In the Authentication Properties tab:
- Clear the Inherit settings from parent check box.
- In the User Authentication Provider area, in the Active drop-down box, select Default User Authentication Provider.
- Click Properties….
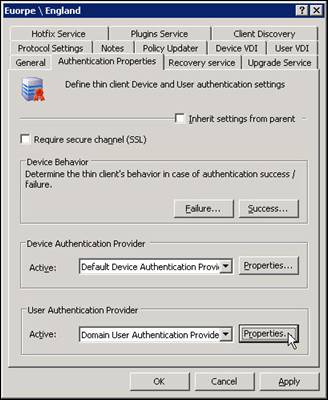
Figure 4: <Site \ Scope> Dialog Box- Authentication Properties Tab
- In the Default User Authentication Provider Properties dialog box click Browse… to search for the desired default user.

Figure 5: Default User Authentication Provider Properties Dialog Box
- In the Select User dialog box:
- Enter the name of the desired default user.
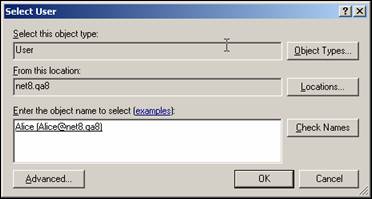
Figure 6: Select User Dialog Box
- Click OK.
- In the <Site \ Scope> dialog box, click OK to complete the procedure and return to the Xcalibur Global Management Console.
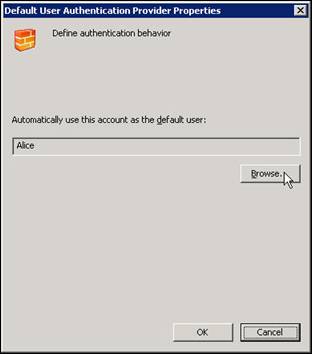
Figure 7: Default User Authentication Provider Properties Dialog Box
4. Process Outcome:
Default User Authentication has been defined for the selected Farm, Site, or Scope.
- The authentication settings of the Farm will be inherited by all Sites (as long as the inherit option, in the Site, was not disabled).
- The authentication settings of a Site will be inherited by all the Scopes it contains (as long as the inherit option, in the Scope, was not disabled).
- The authentication settings of a Scope will determine the authentication behavior of all the thin clients it contains.
5. Movie